
How to add a ligature to a font (fi, and everything else)
A ligature is a glyph plus a GSUB rule — build both for ct on Roboto, on your phone, then verify the exported font's GSUB table and shape text through HarfBuzz.
A ligature is two things, not one: a glyph (the combined drawing) and a GSUB
rule that tells the shaper when to use it. Most attempts fail because only
one half gets built. This walkthrough builds both halves for a real ligature
on a real font — c + t added to Roboto Regular, entirely on a phone in
Font Studio, then verified by dumping the
exported font's GSUB table and shaping text through HarfBuzz.
The same flow covers the classic fi: Font Studio ships with its own recipe
for it, and the parts you type change (fi instead of ct) — nothing else.
Part 1 — the glyph (free)
- Glyphs tab → New Glyph (+) → From Parts.
- Turn "Encode as a character" OFF. A ligature has no codepoint of its
own — it's reached only through the GSUB rule. Leave it on and you've
created a second character that competes with
cin the cmap, which is not what anyone wants. - Name it by convention: component names joined with
_—c_t,f_i,f_f_i. - Pick the parts. Font Studio places each part after the previous one automatically, using the existing advance widths; nudge on the placement canvas if the sidebearings need it.
- Create. The glyph appears in the Unencoded section of the Glyphs tab.
Part 2 — the rule (Pro)
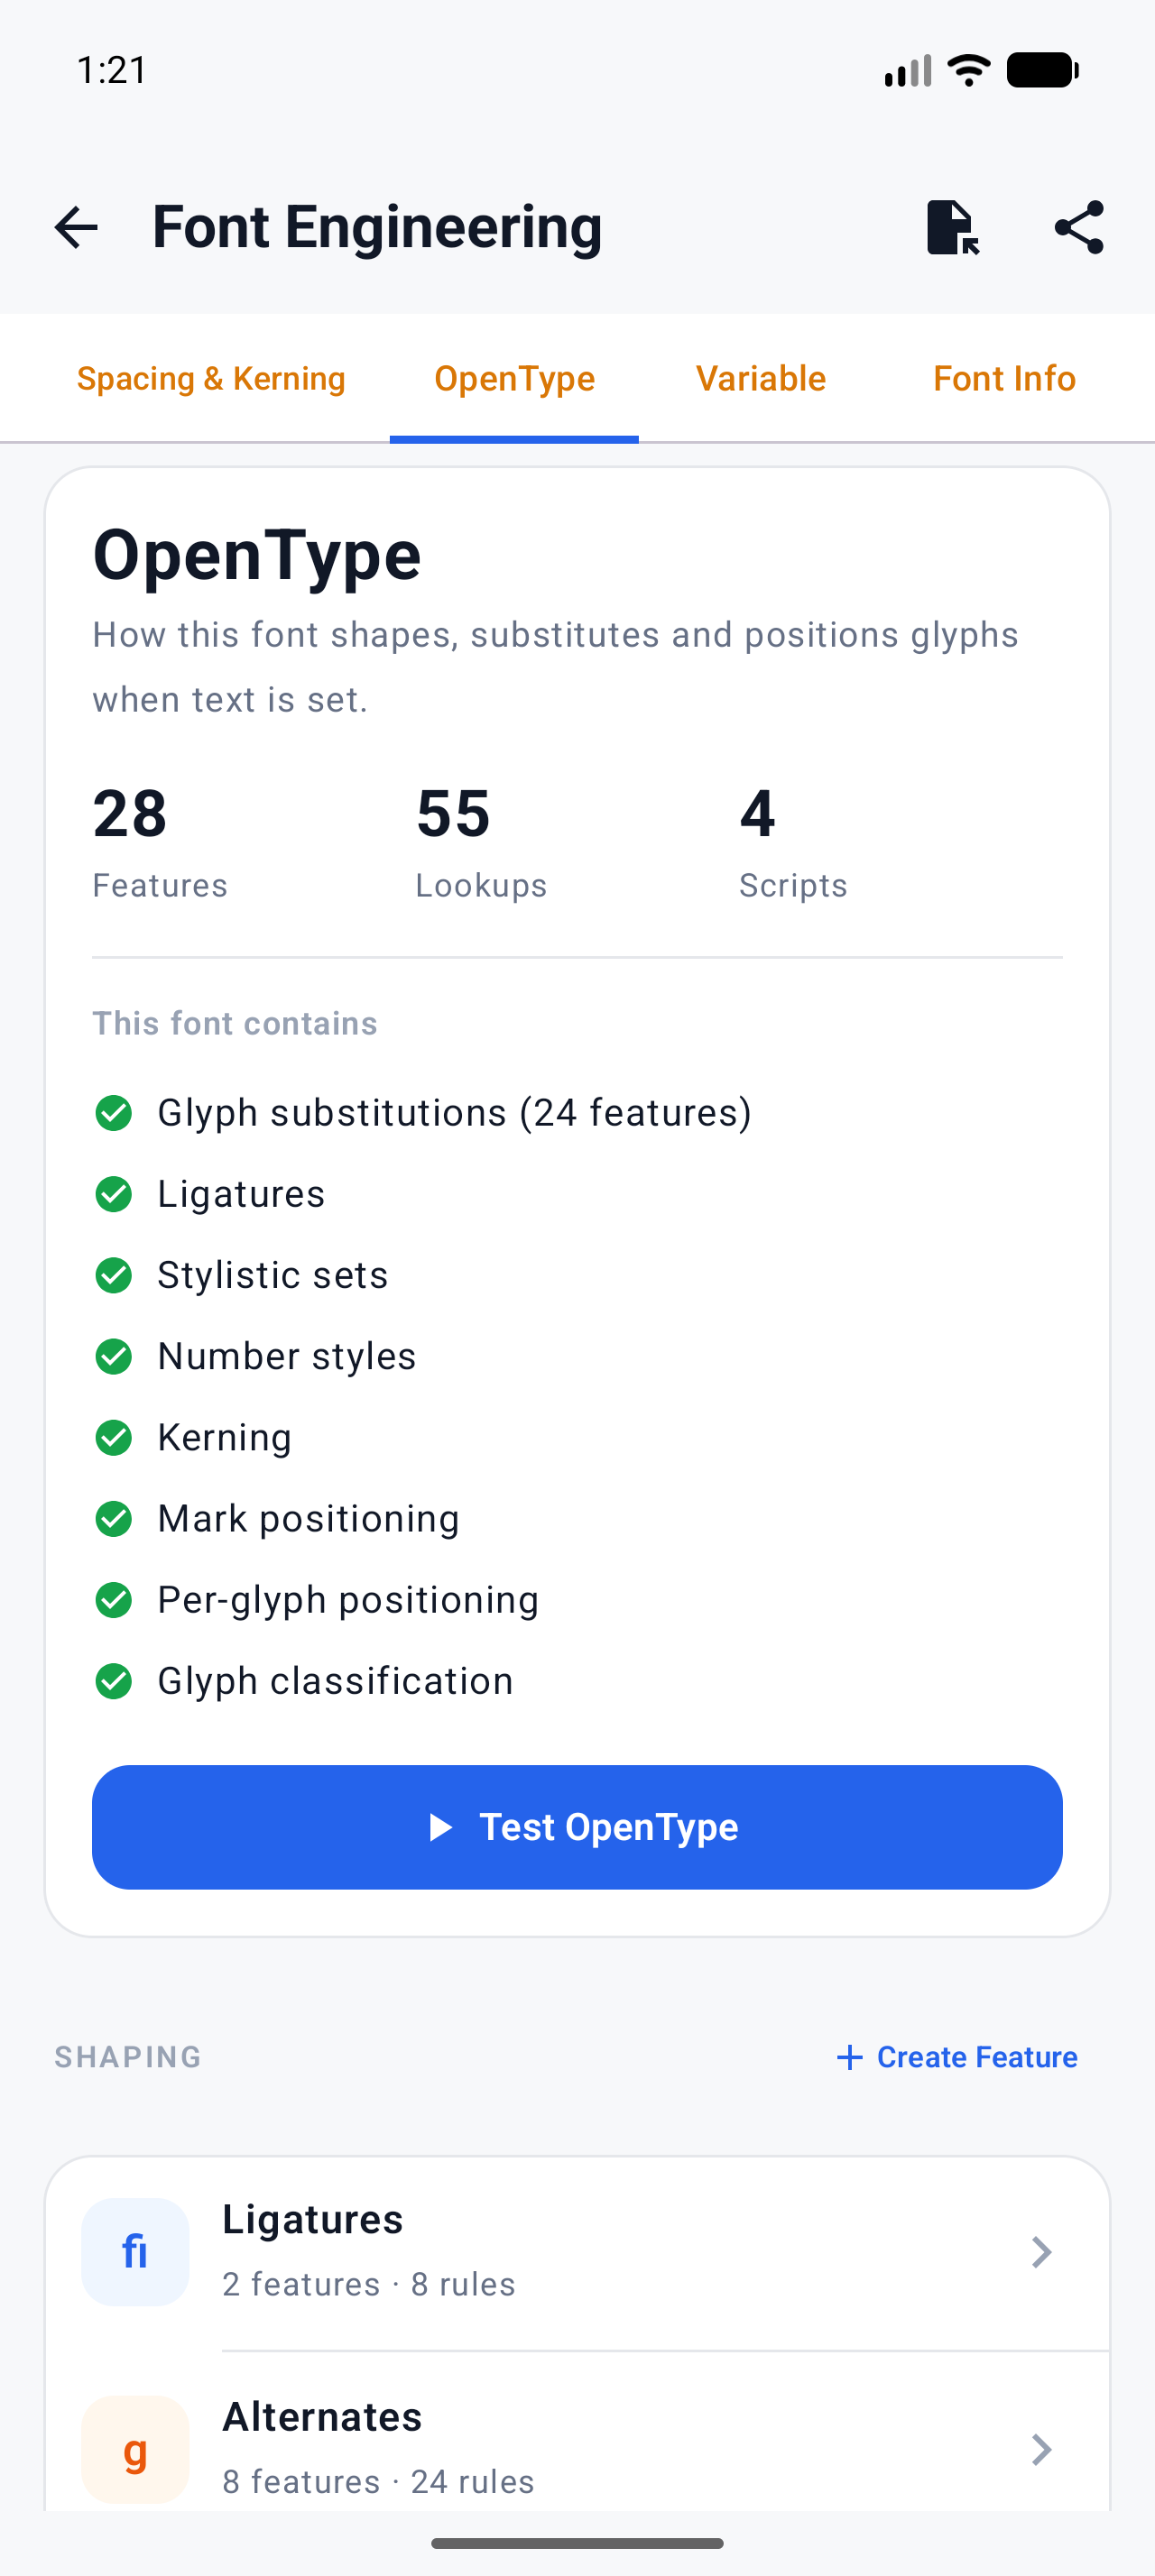
- Command Center → Font Engineering → OpenType tab.
- Roboto already has a
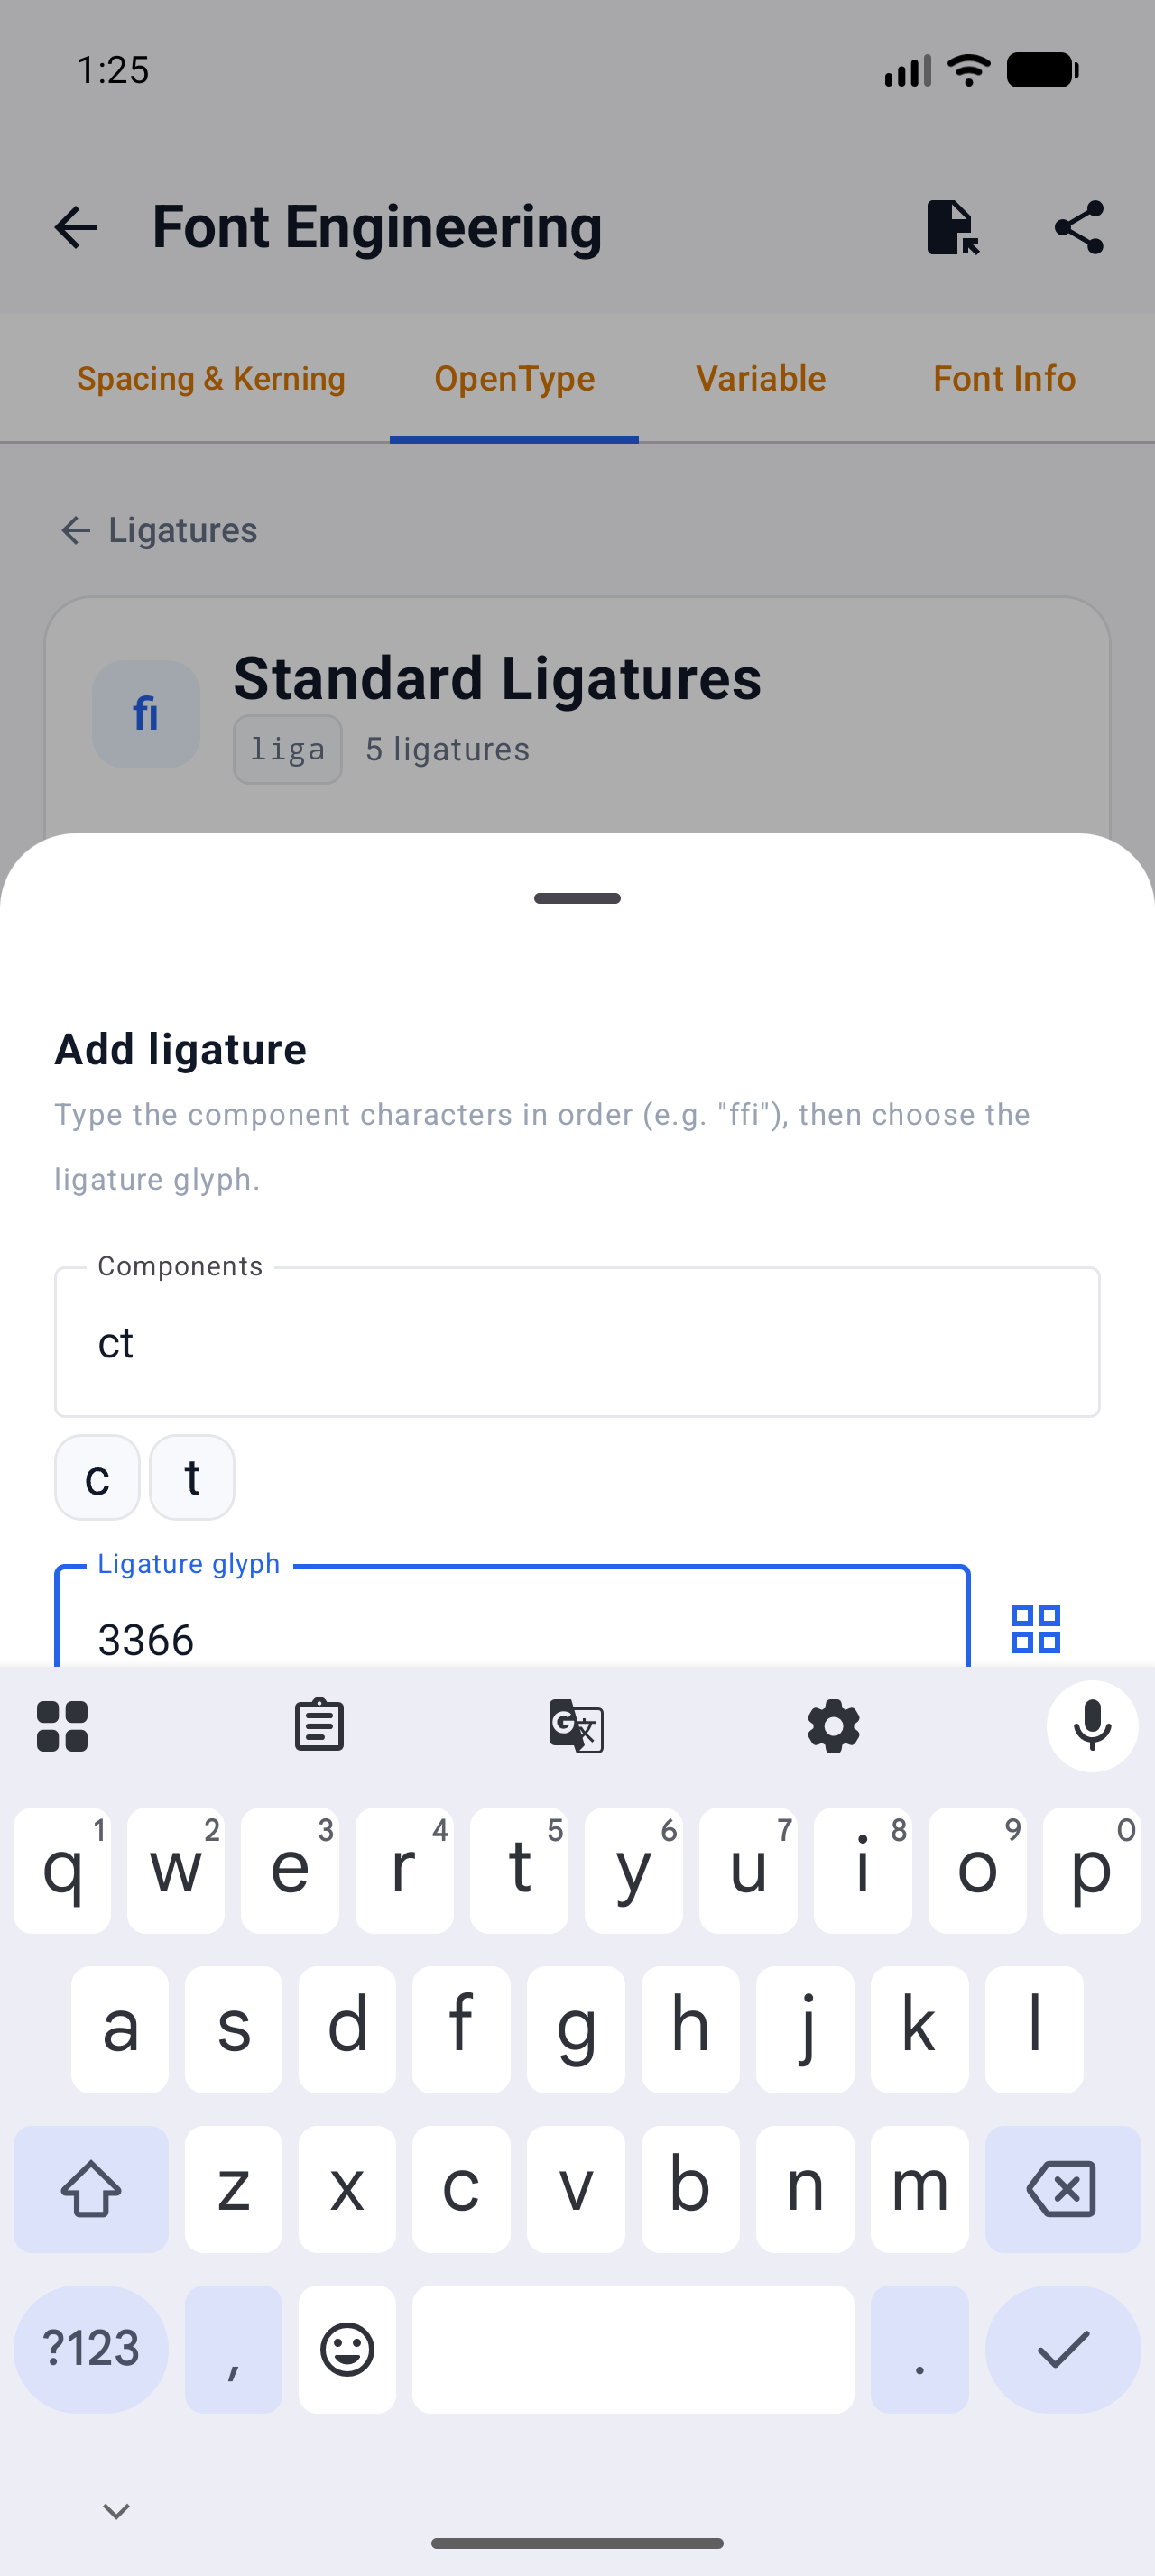
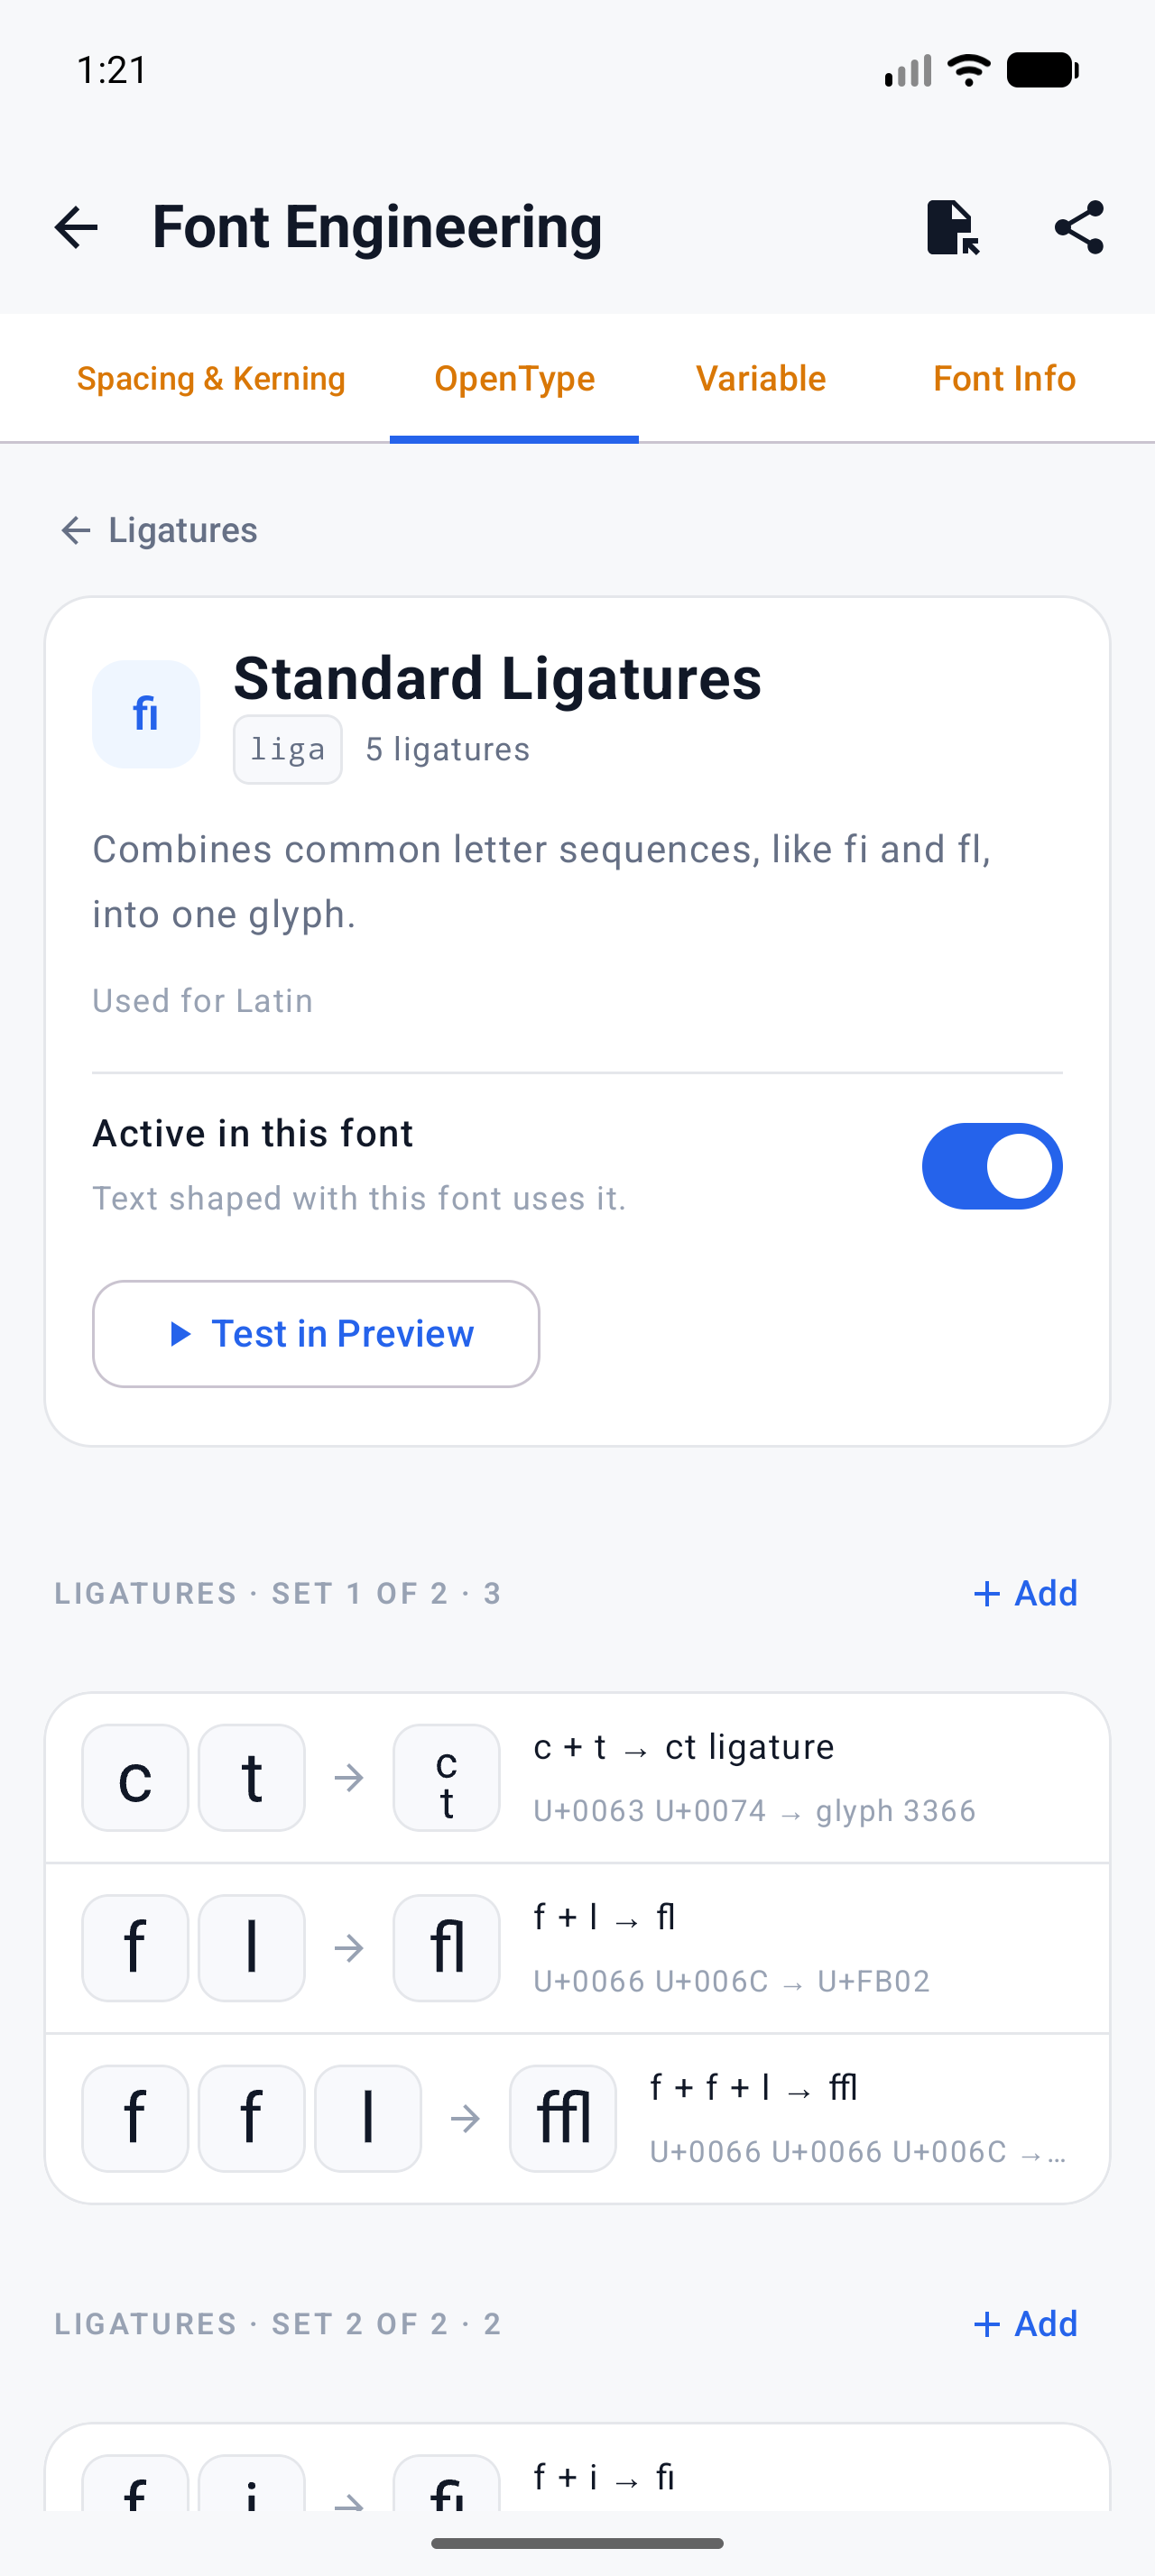
ligafeature ("Standard Ligatures", on by default in nearly every app), so the rule joins the existing feature: tap Ligatures → Standard Ligatures → Add. On a font without one, the overview's Create Feature button buildsligafrom scratch — tap theligachip, lookup type Ligature. - In the Add sheet: Components = the characters in order, plain letters
(
ct). Ligature glyph = pick from the grid — the picker searches by glyph ID or name; glyph 3366 is thec_twe just made. - Advance width prefills itself:
1072 + 670 = 1742— the components' combined width, with a note telling you whether the ligature glyph already matches. A ligature narrower or wider than the letters it replaces makes text reflow visibly as the feature applies; keep the combined width unless you're doing spacing surgery on purpose. - Add, then Apply N Edit(s) — rules are staged until that tap, which is the single most common reason a ligature "doesn't work".
Test it before you export
You don't need any tools to check the result — the app shapes text through a real text engine:
- Tap Test OpenType on the feature's detail screen and type a word with
your pair —
ctshows the combined glyph immediately. - Cross-check in the Preview tab: type normal sentences and watch for the ligature in running text. This is the same shaping path every app using the font will take.
What the exported file actually contains
For the technically curious, the exported font tells the same story. The
liga lookup is now a type-4 (Ligature Subst) subtable with the new pair:
lookup 18, type 4: c + t → glyph03366
One naming detail worth knowing: unencoded glyphs get renamed to
glyphNNNNN (their glyph ID) in the binary — the app's c_t display name is
project metadata, and the exported font carries glyph03366. Standard
behavior in font editors; just don't look for c_t in a ttx dump.
And the shaping test, if you want machine-level proof: with uharfbuzz on the
exported file, ct shapes to one glyph (3366) with default features, and
back to two glyphs — gid 72 (c) and gid 89 (t) — with liga explicitly
disabled:
import uharfbuzz as hb
font = hb.Font(hb.Face(hb.Blob.from_file_path("Roboto_ct_liga.ttf")))
for feats in ({}, {"liga": False}):
    buf = hb.Buffer(); buf.add_str("ct"); buf.guess_segment_properties()
    buf.set_feature(feats); hb.shape(font, buf)
    print([g.codepoint for g in buf.glyph_infos])
# [3366]   ← liga on (the default everywhere)
# [72, 89] ← liga off
The built-ins still work, too: fi still ligates to Roboto's fi (gid 1834),
so the new rule was added alongside the originals, not instead of them.
When your ligature doesn't show
The app's support checklist, in the order that actually finds the bug:
- "Apply N Edit(s)" was tapped — rules live in a staging bar until then.
- The feature's "Active in this font" switch is on.
- Components match the text exactly —
ctfires onct, notc+ soft hyphen +t. - The ligature glyph is drawn — an empty glyph ligates into a blank gap, which looks exactly like a "broken" font.
- The tag is
liga.dlig,ss01–ss20,saltandswshare off until the using app turns them on (CSS, InDesign's OpenType panel, …). - Test OpenType in the app first, then the Preview tab — before blaming the renderer.
In CSS, liga is on by default for Latin text; to opt into fancy sets:
font-feature-settings: "dlig" 1.
Honest limits
- A font with no GSUB/GPOS at all (some extracted, converted, or
hand-built fonts) shows an empty OpenType tab — there's no layout table to
attach to, and this flow needs one. Building a
ligafeature from scratch on such a font isn't currently on offer; get the font into a state that has GSUB first. - Many rules at once is tedious through the sheet — the same OpenType
screen's Import feature file accepts a
.feafile (Adobe FDK syntax), so a text editor + one import beats forty Add-sheet passes. - Contextual ligatures (only between specific letters, or across class definitions) are beyond the Add sheet; such rules are shown and preserved as-is if the font already has them.
What to try next
- Small caps use the same glyph-plus-rule anatomy with
smcp: Adding real small caps to a font - The other GSUB family, character-plus-character: Fixing Arabic joining: building Lam-Alef ligatures that actually shape
- Every way to add a glyph to a font: Adding glyphs — every route
Full documentation